I was faced with the task of learning about a technology that I was not that familiar with. I would provide them with guidance from an ALM and DevOps perspective. In working with this tool I thought it would be a good exercise to blog my experience and show how these two tools are similar in what they do and yet have slightly different approaches.
Installing Red Gate Source Control
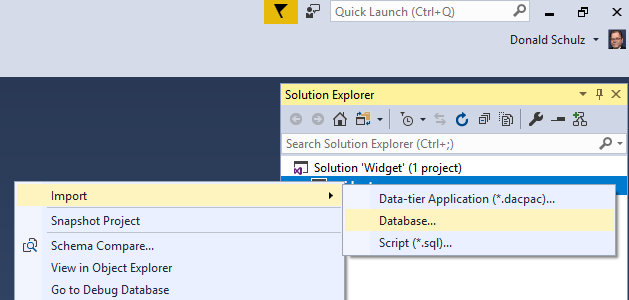
Adding a Database to Source Control with Red Gate
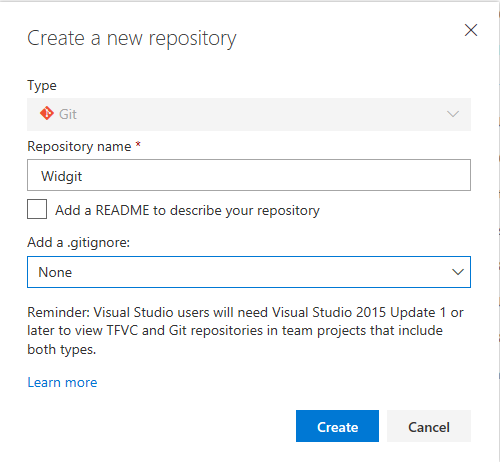
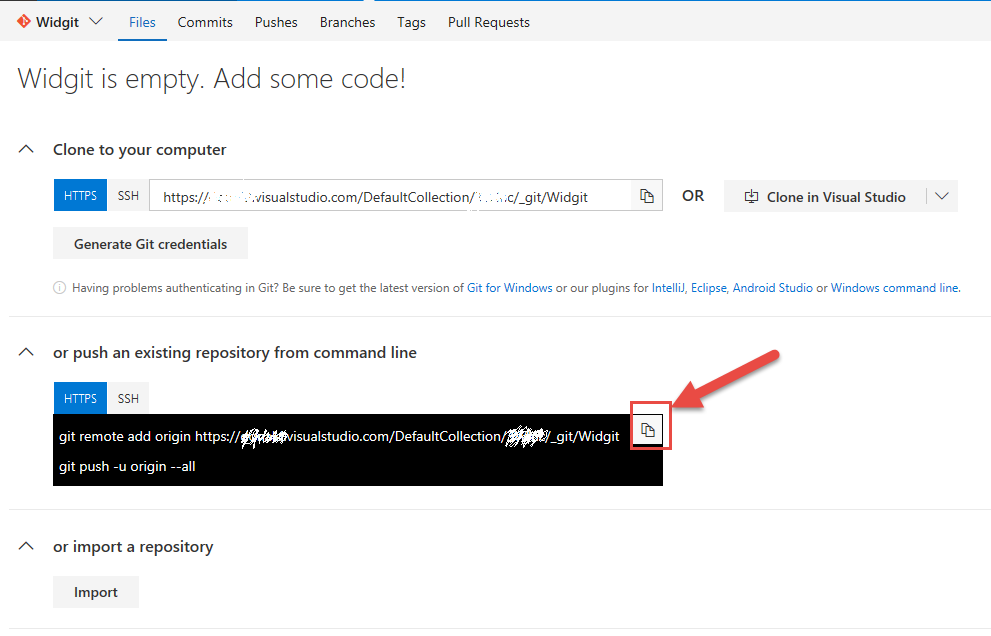
In this walk through I am using git as my repository and in fact my remote repository is going to be in Visual Studio Team Services (VSTS). We need to create a git repository before we can grab the code from our database. We will start with creating a local repository and push this up to VSTS afterwards. I use a variety of tools when it comes to git and for this first step the easiest way to get an empty git repository created is with the command prompt and my favorite way of doing that is in PowerShell with the Posh Git Extension module. https://github.com/dahlbyk/posh-git
    mkdir C:\git\Widget\dbScript
    cd C:\git\Widget
    git init
The screen should now show you a selection of repository types that it supports. Even though we are going to VSTS (TFS in the cloud) we don’t want to use that Source control system type but instead select Git. For the folder point it to the location of the dbScript folder. (C:\git\Widget\dbScript) and click on the Link button. Click on the OK button to close the confirmation screen and you should see that your database icon in SSMS is now green indicating that it is linked to Source Control. There is no source in this container quite yet.
Click on the Commit sub tab of the SQL Source Control and there you will see a list of SQL files that just linking to the source control has found out of the database. These files however, are not in your git repository workspace yet. You will need to enter a commit “Initial Commit” is a good one for the first commit and press the Commit button. The files are now in the folder you designated and checked into your local git repository. If we had the remote setup there might have been a visible option to push these changes up to the remote. Instead we will do this manually now.
Adding a Database to Source Control with SSDT
For this exercise we start in Visual Studio and create a new Project. For the Project type select “SQL Server Database Project” which you will find under the Other Languages in side the SQL Server item of the New Project type tree. We could use the very same database that we used in the previous exercise “Widget” and now that we have a git repository started for our experiment we can push it there as well. So to make sure we have a nice clean separation of these two approaches lets make a new folder in our git repository called SSDT and make this the same level as the dbScript folder that we used in the Red Gate experiment.
Call this Project Widget and the location should be C:\git\Widget\SSDT if you have been following along. Uncheck both the Create directory for solution and Create new Git repository and click on the OK button. At this point all we have done is created a project in Visual Studio and set the location but there is no Database source. We are missing a step so lets go and do that now.
If you go to the Team Explorer tab and click on the Changes tab you will see all the files were you just need to enter a comment like Initial Commit for SSDT and click on the Commit all and Sync as we are in the same git repository that we setup for the Red Gate solution so it will push these changes up to that same VSTS repository.
All done, now you have the Database in source control from two different solutions but overall the same similar results, the tools that you use are different. For SSDT we used Visual Studio and for the Red Gate solution we used SSMS. Lets go back to our Red Gate Solution and see how we can get an Artifact built in the build system that we can use to deploy.
Creating the Artifact from Red Gate Source
Okay so now we have our database source in Source Control lets make sure our target database is up to date. To do that we will start with an artifact which will be a NuGet package that represents the snapshot of the schema from the latest set of changes. We are going to do this on the VSTS build system. If you are not familiar with how builds work in VSTS there are several blogs and articles out there that cover this topic in depth for now I am just going to cover the steps we need to take to produce our artifact, the build.
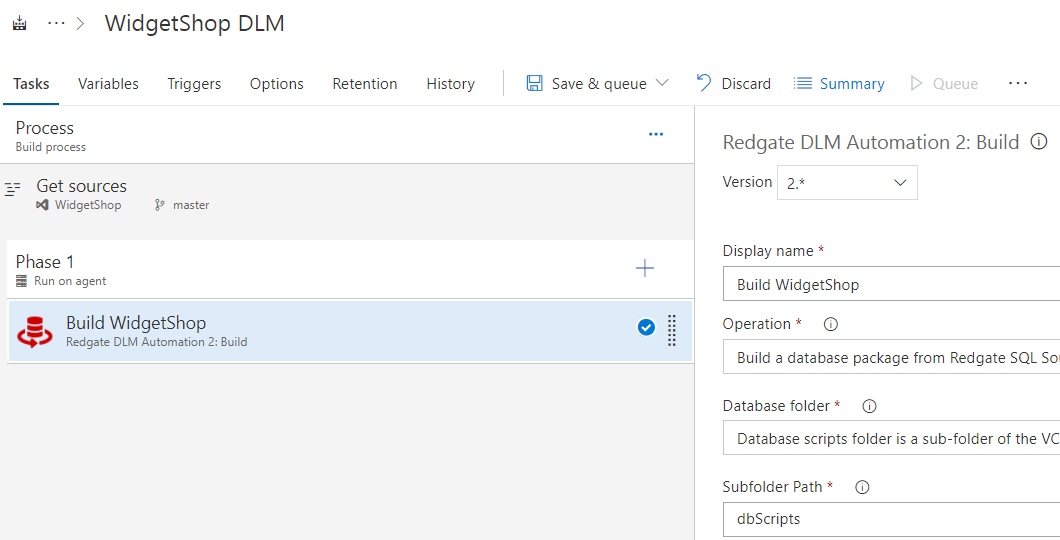
We start by creating a new empty build as there is no template (yet) for the Red Gate Project. When we open this new Build Definition the first thing we will need to do is set the settings in the Process section which is right at the top of the build definition. Here we can name our Build Definition, I have called mine “WidgetShop DLM”. Then you need to set the Agent queue, here I have selected the Hosted VS2017 but if you have a private agent queue you certainly could use that. The only thing you will need to do is to make sure that the Red Gate tool, DMAutomation (which is part of the SQL Toolbelt) is installed on that machine.
The second thing to do is to select our git repository where the source code for our Widget database lives. So a few things I have set here is that the source is VSTS Git, my project which I am calling Demo and my repository called WidgetShop. The default branch is set to master and that is fine for now. Leave the rest of the settings as they are.
You should have an Agent Phase section (probably called Phase 1), we won’t change anything about the settings of this section, but I will mention that in a single Build Definition you could have several different Phase’s and each Phase could use a different Agent queue if you desired, the default is to inherit from the definition (the one we set in the Process area). What we will do in this Phase is to add the Redgate DLM Automation 2:Build task and you do that by clicking on the green “+” symbol. The easiest way to find the task we are looking for is to enter the letters “DLM” in the search box. If this set of tasks has never been installed in your instance of VSTS you will be able to do that from this page, otherwise just select the “Redgate DML Automation 2:Build” by hovering over the item and clicking the Add button.
There are just a few settings that we need to change here.
- Operation: “Build a database package from Redgate SQL Source Control”
- Database folder: “Database scripts folder is a sub-folder of the VCS root” If you followed my steps and placed the source in the dbScripts folder then this would be the choice. The other choice is if you did not put the source in a folder then you would make the other choice of it being in the root.
- Subfolder Path: “dbScripts” Actually you can use the ellipse button on the right of this text box and navigate to the actual folder in the git repository.
- Output NuGet package ID: “WidgetShop” This will be the name of the NuGet package that gets created.
- Temporary server type: “SQL LocalDB (recommended)” Since we are using a hosted agent and it has full versions of Visual Studio installed I know that this option is available to me and simple to do. If you have a large database that is using the full feature of SQL Server then you might want to point to an actual SQL Server and when you change to that option it will prompt your for the Server Name, Database, Authentication method and if you use SQL authentication a place for you to provide the user name and password.
- Show advanced options and confirm that the Publish Artifact checkbox is checked.
Save you definition and Queue a build. After the build completes you can click on the link of the specific build where displayed in the sub menu is an item named Artifacts. As you drill though that using the explorer you will see that you now have a WidgtShop.1.0.nupkg which is the package that we will be using to deploy these changes to our environments but first lets see how you would do these same process with and SSDT project.
Creating the Artifact from the SSDT Source
We start this process by creating a new build definition and the first thing that the wizard is going to ask you is the repository that this project is in. Again we are using the same WidgetShop git repository in our Demo project this is exactly the same step that you did with the Red Gate Project. For the SSDT project we take a slightly different approach for the selection of the build template. Here we select the .NET Desktop and click on the Apply button. This populates the build definition with 7 tasks that are ready to go. Right out of the gate, the Agent queue is probably pointing to “Hosted VS2017” and that is what we want for this demonstration but if you have a private build server you certainly are welcome to that.
At this point we can just run the build as this template will know how to find the project and build it and publish our artifact for us. One thing you might notice here is that there is no mention of a database so it is using MSBuild to create this package directly from the source in source control.
In the end an artifact is created so if we click on the build number of the build after it has completed and click on the Artifacts sub menu, using the Artifacts explorer we walk down the tree and at the end of that rainbow we will see probably about 4 files but the one we are really interested in is the Widget.dacpac file. This is the file that represents a snapshot in time of the database schema at the time of this build and this is the file we will use to do our deployments which we will do next.
Deploying the Red Gate Artifact
Similar to the build steps that we used to create the artifact, Red Gate provides another task that we use in the release definition called “Redgate DLM Automation 2: Release”. Lets go over the steps on how to implement that into an environment. In my environment I am using Deployment Groups to deploy to a virtual machine that I have setup in Azure but this is exactly the same process that you would use to deploy to a private machine in your network. I am not going to go into details about setting up Deployment Groups but for more information follow this link: https://docs.microsoft.com/en-us/vsts/pipelines/release/deployment-groups/index?view=vsts
We start this part of the exercise by clicking on the Create Release Definition button and for the template select the Empty process, which is right at the top of the list of available templates. Then you can give your environment a proper name other than “Environment 1” like Dev, Stage, or Test to signify what this environment represents. Next you will want to add the Artifacts from the build, so click on the + Add link beside the Artifacts header. Here you will select the Project (in my case this is Demo) then select the build definition. If you have been following the names I have been giving things then this should be the “WidgetShop DLM”. The Default version will default to the Latest and that is what we want and accept the Source alias that is provided. Click on the Add button.
Now we will start to add the tasks to the release in our environment so either click on the Tasks dropdown and select your task or click on the link in the environments where it probably says 1 phase, 0 task. Either way this will bring you to the same place where you will see your environment block (another chance to rename your environment), and probably an Agent phase (which is the default). We don’t want the Agent phase so click on it to select it and then on the right hand side of the screen click on the Remove link.
This will take you back to the Environment block with a red message that your Environment should have at least one phase. Click on the ellipse button to the right of this block and select “Add deployment group phase” and in the Deployment group select the Deployment group that you setup. That is all you need to do for this part. Next we need to add some tasks into this Deployment Group and you do that by clicking on the “+” button on the Deployment group phase block. Enter DLM in the search box and if you have the “Redgate DLM Automation 2: Release” installed select it and click on the Add button. If you have not installed it you can select it in the Marketplace area and click on the Install button first then add the task.
With the task added to the Deployment group phase, we configure it with the following settings.
- Operation: choose “Deploy database changes from a package” from the dropdown control.
- Package path: The best way to select this required file is to use the ellipse button at the end of the text box and navigate to the file probably called “WidgetShop.1.0.nupkg”
- Target SQL Server instance: I have used “.\SQLExpress” because that is what I have installed on my machine you should but the instance name or “.” if this is the Default instance on this Server.
- Tarket database name: For this I named mine “WidgetCI”. One other thing to note is that this database needs to exist before this tool can work. It can be an empty database, that is fine but it must exist or else this task will fail.
- Authentication method: I choose “SQL Server authentication” from the drop down as I am not in a domain so windows authentication would have been harder to pull off. When you choose SQL Server authentication it will prompt you for Username and Password.
- Usernme: Enter the username for your SQL Server
- Password: Enter the variable name for the password $(SQLPassword) and in the Variables section create a new variable SQLPassword and in the value put in the actual password and then click on the lock button to hide the actual password.
With that you can kick off a new release and the deployment to this environment will begin.
Deploying the SSDT Artifact
To deploy the SSDT dacpac file we follow the same steps to get an environment and get to the Deployment Group phase. Then click on the “+” button on the deployment group and in the search window I just typed SQL and up at the top appeared the task I was looking for “SQL Server Database Deploy”
We just need to configure a few things on this task to complete this:
- Deploy SQL Using: “Sql Dacpac” select this from the dropdown list.
- DACPAC File: Click on the ellipse button and walk down the linked artifacts tree until you get down to the Dacpac file you are going to deploy.
- Specify SQL Using: “Server” select this from the dropdown.
- Server Name: could leave this as localhost if it is the default server instance on this machine. I used “.\SQLExpress” as that is the server and instance name.
- Database Name: I named this database “WidgetSSDT” just to make this deployment won’t override my Redgate one. This database does not need to exist as it will be created if not found.
- Authentication method: I choose “SQL Server authentication” from the drop down.
- SQL User name: Enter the user name for your SQL Server
- SQL Password: Because I used the same user name and password I just entered the $(SQLPassword) variable that I setup with working with the Redgate tool task.
With that you can kick off a new release and the deployment to this environment will begin.
Conclusion
As you can see the two tools have a very similar model just a different approach from a different starting point. With SSDT we start in Visual Studio and with the Redgate tools we are starting in SQL Server Management Studio. I am sure for some DBA’s that have lived most of their career in SSMS they will likely lean towards the Redgate solution. That is okay, it does provide a good ALM/DevOps solution but you must be careful as well. The version control is not a true git version control but does more of a sync operation. For instance in a true git client I should be able to switch from one tool to another and because the tools should be reading directly from the repository you should be able to start in one tool and finish in another. However the Redgate source control does not work this way. It builds other workspaces outside of the git repo to manage some of these changes. what may happen is if you make a change outside of SSMS, the source control in SSMS may not see your changes and things could fall out of sync. This is also a reason why they don’t have good support for branching. You can still use branching if you create the branch first and check it out before you start to work on your changes.