Azure DevOps (aka TFS, VSTS) has always had this ability to save the content of a work item as a template. In older versions of Team Foundation Server this was more obvious once you downloaded tools like the “TFS PowerTools” but then it was in your face; there were templates. Today in Azure DevOps they still exist, are just a little harder to find and you can have a different set of templates for each team.
I have taken advantage of this team separation and together with an Azure DevOps extension “1-Click Child Links” use this tool to create some repeatable tasks that happen every time I create a new blog post and want to get that work done within my current sprint. This makes it really easy for me to see my burn down charts and a clear idea of where I am in the process of getting another post out there.
Where Do I Find the Templates?
This all begins on the Project Settings page. Start with being on the Project were you want to add these templates.
In my case I have a bunch of Projects that are used for experiments and I do all my development and blog posts in one Project.
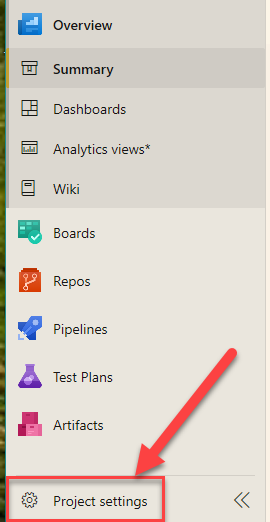
Then at the bottom on the left hand side of the screen you should see an icon that looks like a gear.
Click on this and it will open the Project Settings. Before we get too far, you will need to be a Project Administrator of this project to implement these changes.
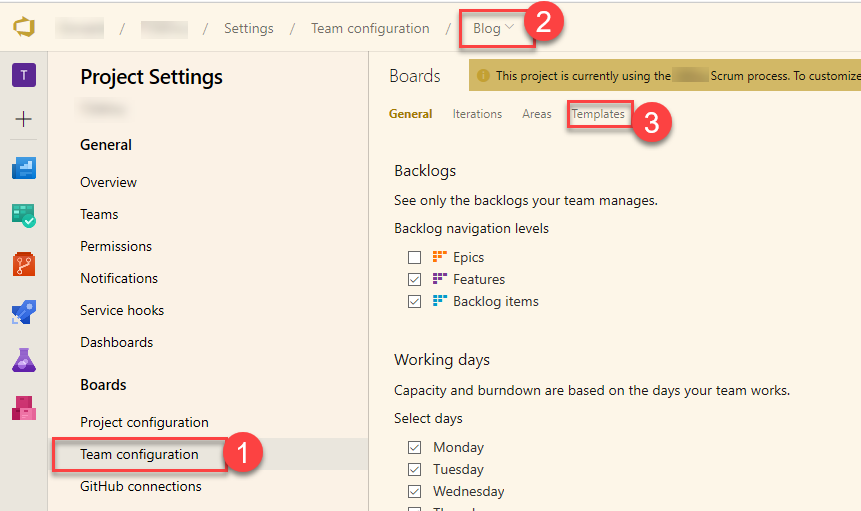
Next, on the Project Settings list you should see a menu item called Team configuration just under the Boards main heading. When you click on that a settings page for teams will show up on the right. Before you get too excited to want to click on the Templates sub menu that you can see, make sure that the correct team has been selected first. This is done by the what may not seem so obvious but is a dropdown control at the end of the navigation bread crumb. Select the team and then click on the Templates sub menu.
Why Am I Writing Blogs in a Git Repo?
In case you haven’t been following me on a regular basis you might be wondering what is going on here. I am talking about managing my blog posts like it was software development and you might be wondering why? This web site content is all in a git repo and it goes through a normal CI/CD pipeline just like I would when writing software. The only difference is that instead of compiling down to a dll or an exe, I am generating a static web site that then gets delivered to my web server in test and to an app service in Azure where you are reading this from. There are many static web site generation tools out there that do this kind of thing and the one I am using is called Hexo. You can see more about the beginnings of this journey from an earlier blog I wrote. A New Start on an Old Blog
Creating The Templates
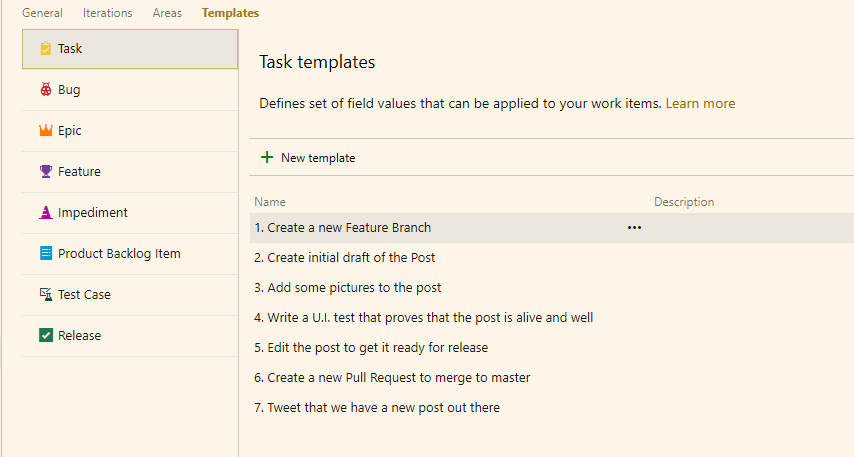
Before we get into creating the templates let me explain what it is that I am trying to accomplish here. When ever I come across a topic that I think would make a good blog post I create a Product Backlog Item (PBI) this would be the equivalent of a User Story if you are using the Agile Process template or the Requirement if you are using the CMMI Process template. From there I have about 7 tasks that are exactly the same and the same amount of estimated time to complete, publish and get the word out that I have a new blog post out there.
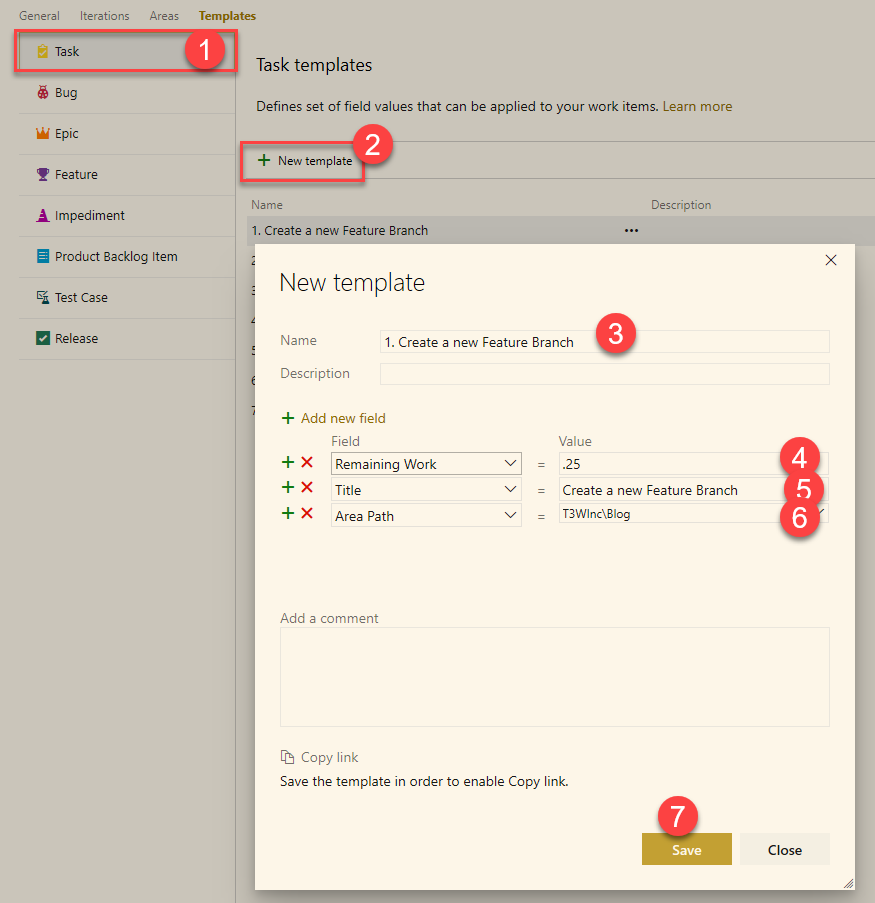
What I want are seven (7) child task work items that can be created automatically for me from the PBI that contains the topic name. As you can see on the screen in front of you all the various work items that you can create a template for. I want to create tasks so make sure that “Task” is selected. Then click on the “New template” button.
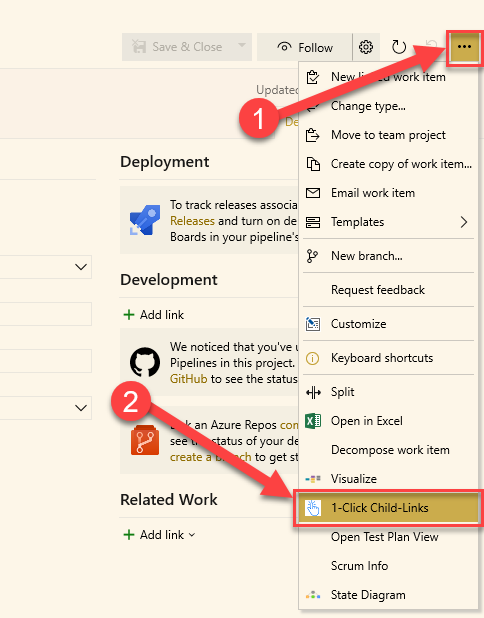
1-Click Child-Links
First make sure that you have the extension that you will need for this. Go to the Marketplace and enter “1-Click Child-Links” into the search box and you should see the extension. Install this onto your system.
With the extension installed. Go to the backlog list of the Blog team (remember that each team has their own set of templates) and open the PBI, or User Story, or Requirement (depending on your process template) and click on the ellipse button which will display a menu and you should see the “1-Click Child-Links” menu item. Clicking on this will add the seven (7) child tasks that we setup as templates earlier. That is how I work with work item templates in Azure DevOps.